ShowDown System Software Chip Replacement
The ShowDown Operating System and Application Program reside in a single 28 pin chip. This chip is mounted in a socket soldered to the CPU printed circuit board. As new software becomes available it may be installed in the ShowDown system by the user. You will need a small phillips type screw driver and a small blade type screwdriver.
Disconnect all cables attached to the CPU box. Place the box face down on a flat cloth to protect the overlay.
Remove the two phillips screws that attach the CPU box top to the box bottom.
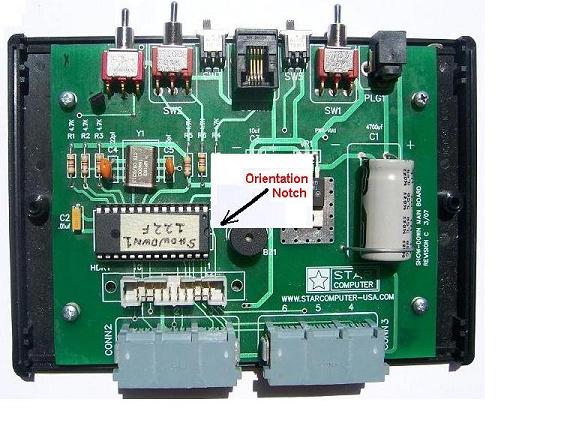
Disconnect the 20 pin flat cable that goes to the Timer Module. Notice the location of the CPU chip shown below.
Notice the orientation notch in the chip.
Insert the small flat blade screwdriver in between the end of the ship and the chip socket.
Carefully pry up on the screw driver and remove the old CPU chip.
Make sure the orientation notch location is correct and lay the new chip in the socket.
Carefully insert part way one side of the chip legs into the socket and then the other side.
Firmly press the new chip legs into the chip retaining clips of the socket.
NOTE: If you bend any legs they can be easily straightened using a pair of tweezers.
Examine the chip to assure that all legs are secured and the orientation notch is correct.
Connect the Timer cable. Replace the CPU box top and secure it with the two phillips screws.
Discard the old chip only when you are confident the new chip works as expected.